Curtains are the ultimate nesting project. Not only do they finish off a room, but they keep out drafts and provide privacy. And lined curtains are even cozier. Making curtains is not as hard as it may seem. If I can do it, so can you — I promise. All it takes is some skill in measuring, a good plan and the ability to sew a straight line.
Most curtain panels are just rectangles. So you need to know two things: the width and the height of the panel that you’ll be making. And that means knowing a little bit about the measurements of your window.
For these kinds of projects, I always count on a trusty diagram. I don’t pull out the graph paper — any scrap will do. The key is to measure carefully.
I have three windows that I’ll be covering, but they’re all the same size and shape — so one drawing would do it. My goal was to determine the height and width of the finished curtains. Then I could take those dimensions to figure out how much fabric to cut.
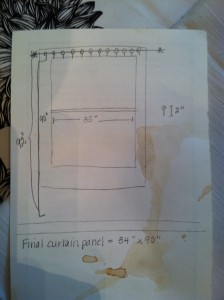
I wanted floor-length curtains, so I measured from the top of the curtain rod (or where that rod would be) to the floor. Then I needed to take into consideration the curtain rings. I’m lazy — give me a break, lined curtains are enough work! — so I chose to use clip-on curtain rings. (In my drawing, those are the little circle things at the top of the window.) That added about 2″ to the hardware at the top of the curtains, but meant I wouldn’t need to sew tab tops or button holes or a pocket for a curtain rod. (Besides I like the look.)
The measurement from the floor to the top of the rod is 92″, so the finished curtain panel would need to be 90″. (92″ – 2″ = 90″)
Now for the width. There is all sorts of advice for this measurement, but most sources say to make a curtain panel like I was planning, each one should at least 1.5 to 2 times as wide as the window itself.
But threw that advice out of the window. As I described on my guest post for Harmony Art on Wednesday, I felt the design of the fabric was strong enough that I didn’t need more than around 34″ for each panel width. This had another benefit: because the fabric I was using was 110″ long, I only needed one yard of fabric per panel.
(Did you see what I just did there? I broke the rules! Being a grown up is really freeing.)
So, now I had my finished fabric width and length, but that’s not how much fabric I would cut. Nope, I have to consider the hems, unless I was okay with frayed edges. (I’m not.) And that required a second diagram.
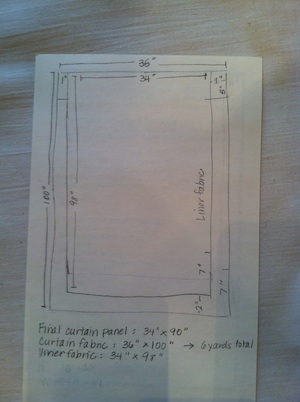
Basically, I have two rectangles here. The larger one is my curtain fabric. The smaller one is my lining. If you think of this diagram as looking at the back of the curtain, that will make sense.
The ultimate goal was to figure out how much fabric I needed to cut — based on the finished size of the curtain panel. So what I ended up doing is adding to the finished panel size. Here’s the basic formula for the length:
top hem + finished panel + bottom hem
For my design, that meant:
5″ + 90″ + 5″ = 100″
(Ignore the 7″ measurements at the bottom of the drawing. They should have read 5″.)
Same goes for the sides:
left hem + finished panel + right hem
1″ + 34″ + 1″ = 36″
Ta-da! I now know what size to cut my curtain fabric: 100″ x 36″
The lining is a bit different. I want the top edge of the lining to line up with the curtain fabric. This way, the top of the curtain is sturdy enough for the curtain clips. But the sides should be smaller, to allow for the little “frame” of curtain fabric all the way around. An added benefit is that I don’t have to hem the lining fabric at all — the rough edges will just tuck inside the curtain fabric hem.
Lining length: 100″ – 2″ = 98″
Lining width: 36″ – 1″ – 1″ = 34″
If I’ve done my math correctly, the only thing left to do is cut, iron and sew!
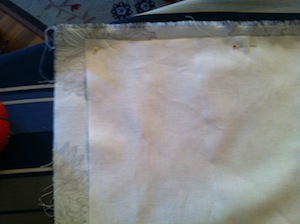
This is the lining pinned to the curtain fabric. (The top doesn’t match up perfectly because of the selvedge, or manufactured edge, of the curtain fabric.)
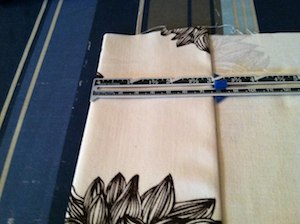
Starting the top hem of the curtain (upside-down). First I fold the rough edge over and iron.
… Then I fold over to tuck in the rough edges of the fabric and make the finished hem.
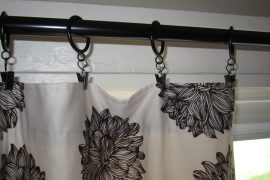
After a few hours of cutting and ironing and ironing and ironing and sewing and ironing, I finally had two finished curtain panels:
So I’m already looking at my mistakes. This weekend I’m going to revisit at that right panel, which seems a bit long. I’ll probably take out the top hem and re-do it.
The diagrams made all the difference in the world with this project. Without them, I would have had a terrible time visualizing what I needed. And honestly, that little bit of math was much easier than the sewing (and ironing and ironing and ironing and ironing).
When have you used a diagram to help you solve a problem or complete a project? Share your experience in the comment section!
